
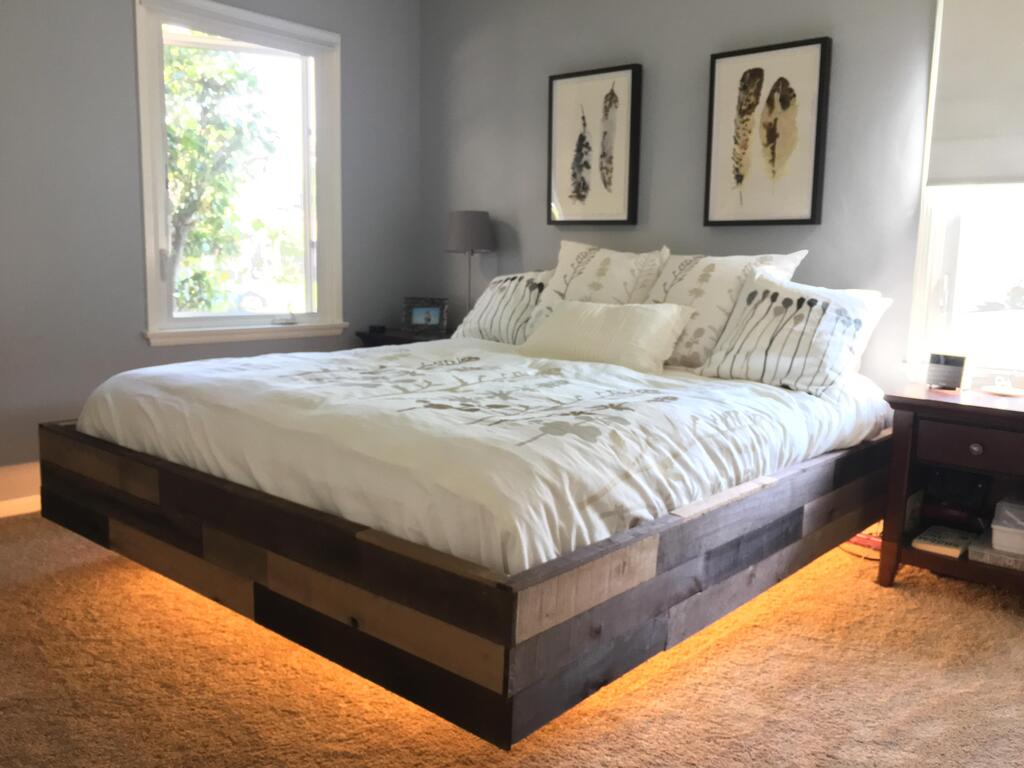
Do you have a bed with a rickety metal frame? Or maybe you keep the mattress directly on the floor and don’t have a frame at all? Have you ever thought about getting a nice DIY floating bed frame for your bed? It can add a great touch of style to your room, and you can get rid of that annoying squeaky scrap metal!
Here’s a simple diy floating bed frame idea to build one out of wood for a double bed that you can adjust to any height or size you want!
1. Get Everything You Need:
You will need a circular saw, a set of “L” brackets, 3 ” coated screws, plywood or MDF, and several pieces of wood. For the latter, specifically, buy:
Two pieces of 5x10x212.5 cm wood
Five pieces of 5x10x167.5 cm wood.
Eight pieces of 5x10x48.5 cm wood
Two pieces of 4x10x187.5 cm wood
Four pieces of 4x30x142.5 cm wood
2. Create A Base Frame:

Use the coated screws to attach butt joints to connect the 187.5cm boards with the 142.5cm boards. You will get a rectangular structure with dimensions of 150×187.5 cm. There are lots of DIY floating bed frame designs; you can choose the shape you love the most.
3. Add The Sleepers:
Slide the remaining 142.5cm boards inside the rectangle in three parts; always use the coated screws to secure them in place. Keep this basic structure aside for now.
4. Create The Platform Frame:

To create a DIY floating bed frame for the platform, fix the 212.5 cm boards together with two 167.5 cm boards, always with butt joints and coated screws, so as to obtain a 175×212.5 cm rectangle.
5. Add The Sleepers:
Insert the remaining 167.5cm boards inside the rectangle by dividing them into four sections. Always use coated screws to secure them in place.
6. Add Supports:
At this point, between the crossbars, you have to insert the 48.5 cm pieces of wood, two for each section. Arrange them evenly, but in a chessboard pattern, so that the left edge and the second from the right are about the same level, and the right edge is the second from the left. Screw them well.
7. Strengthens The Corners And Butt Joints:
Use the “L” brackets for this job and reinforce the corners of both the base frame and the platform. You can also add brackets on the other internal joints to make them stronger.
8. Add The Plywood Base:
Take your measurements and cut them out of plywood to match the dimensions of the platform. In practice, it is a question of covering the structure with two sheets of light wood. Secure it to the bed on the inside crossbeams, so the screws don’t show outside the platform.
9. Paint The Bed:

Sand it and then color it (or use a natural tone stain) as you like.
10. Done! Place The Platform On The Base Structure And Find Its Final Location:
You can fix the two sections with appropriately placed “L” brackets. Add the double or queen-size mattress!


Final Advice
If you slightly change the choice of materials for the legs and corners, you can build a fantastic canopy bed! Suitable columns with a slightly larger diameter are all you need to turn this DIY floating bed frame into something exceptional.